
Background Information:
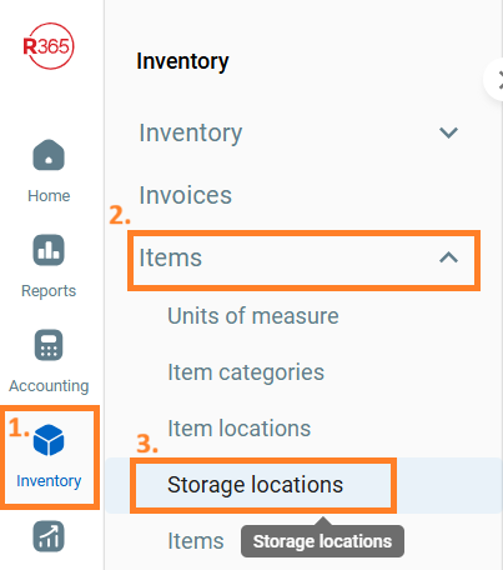
In R365, navigate to Inventory > Items > Storage Locations
Items can be added to multiple storage locations, and even multiple times to the same storage location.
Changes are saved as you go, but don’t navigate away or close the whole browser window immediately after making a change. There is no indication anywhere on the page that it has saved.
For AMs, or anyone assigned to multiple locations, be sure you have selected the correct store from the drop-down list before making any changes.
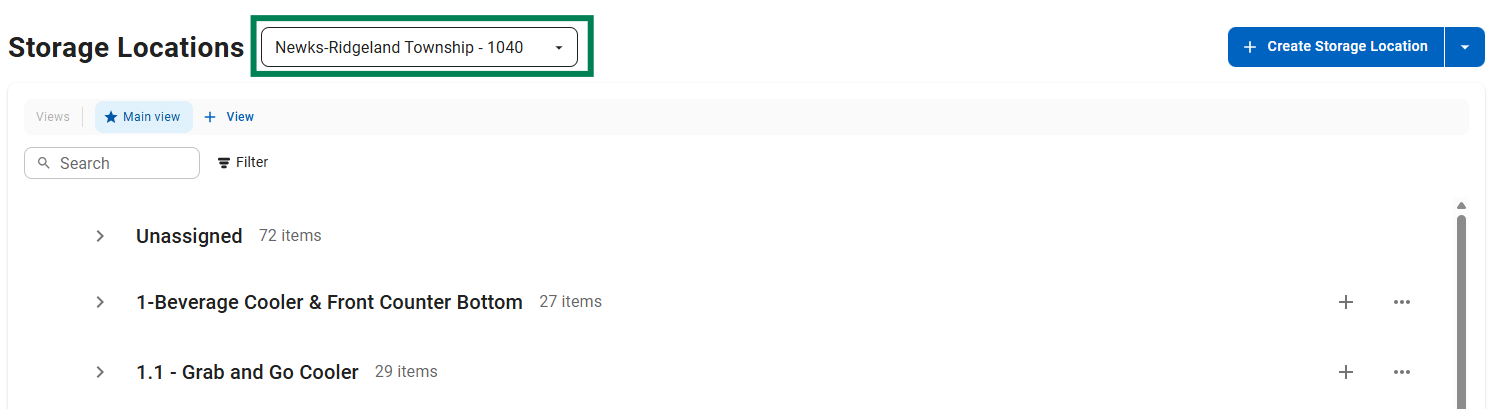
Unassigned Items: these are items that are not currently in any of your storage locations. There are quite a few of them, but you should not have to do anything in this storage location once your storage locations are set up shelf-to-sheet.
To add an item to a storage location
- Click the “+” symbol next to the name of the storage location.

- A search bar will appear on the right side of the page where you can search for the item you wish to add.
NOTE: The search looks for an exact match. Just like filters in Crunchtime, partial searches can be more helpful in narrowing down the items.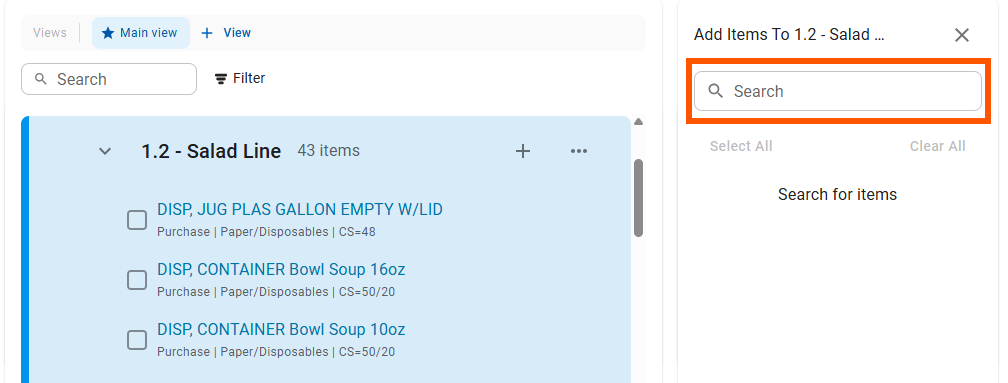
- Once you have used the search to find the item, click on the “+” next to the item to add it.
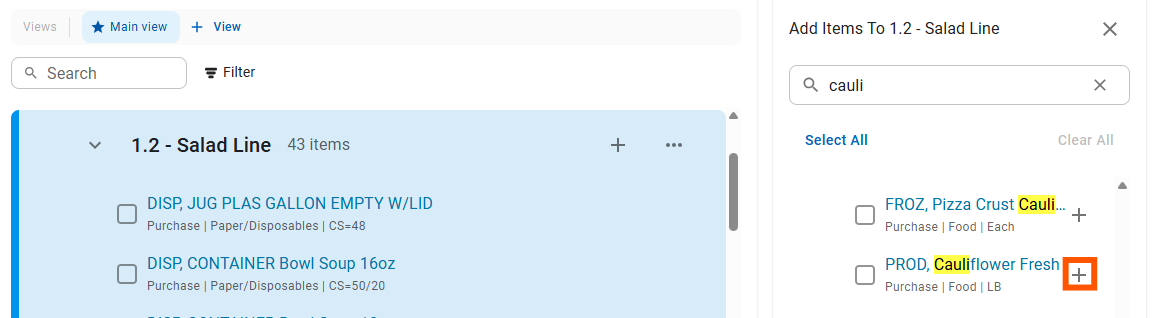
Note: the item will be added to the bottom of the list of items already in the storage location.
Note: You can add the same item multiple times to a single storage location. - If you have an item that needs to be in multiple storage locations, you can leave the search window up and click on the “+” next to the new storage location. This will change the name of the storage location you are adding the item to.
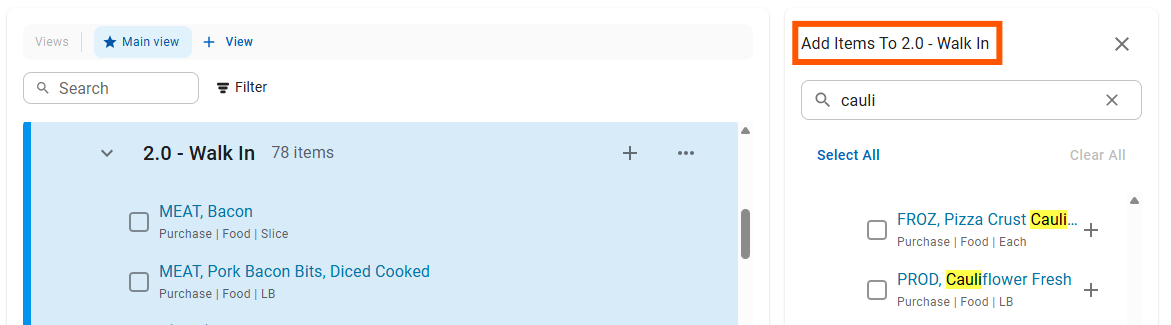
Then you need to click the “+” button next to the item name again and it will add it to the new storage location.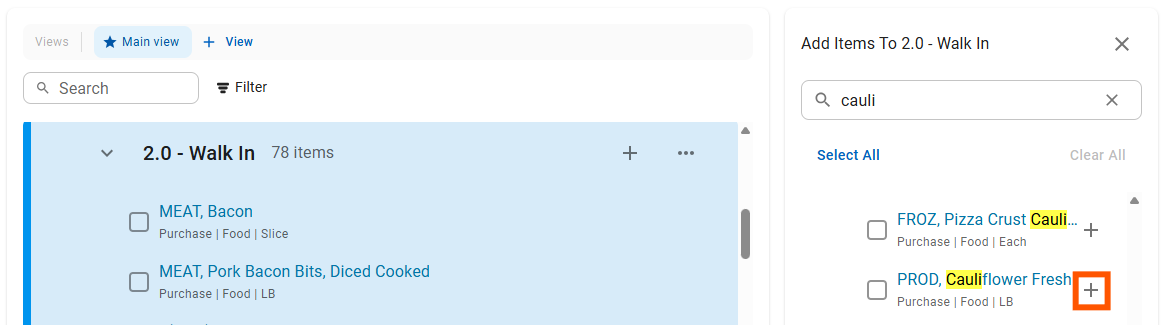
To Move items within their storage locations
- Clicking the arrow or next to a storage location or clicking the name of the storage location will show/hide all of the items within that storage location.

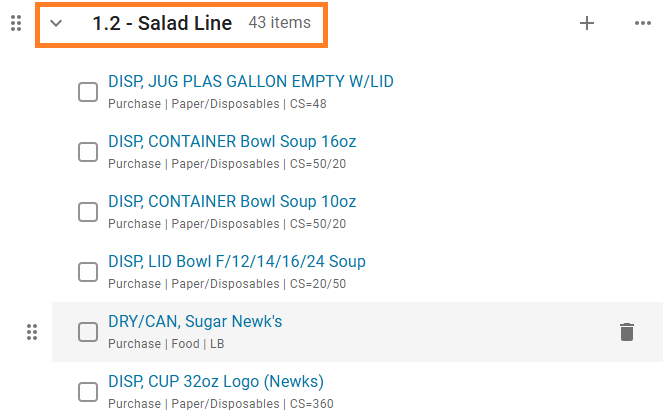
- Once the items are showing, hovering over an item will show a circle with six dots.
Click the six dots and drag the item up or down to its correct location.
A blue line will appear to help you see where you are moving the item to.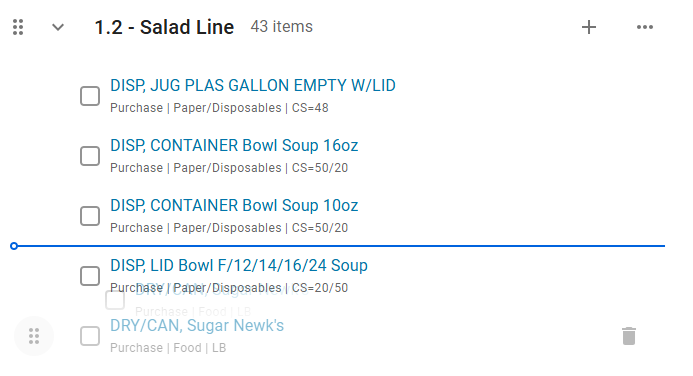
- Release the mouse button once the item is in the correct location and it will stay there.
To change the order of storage locations
The storage locations themselves can also be moved.
Just like moving an item, you will click and drag the six dots next to the name of a storage location, and then drag and release the mouse once it is in the desired spot.
Note: Unassigned cannot be moved, and is the only storage location that cannot be deleted. It will always appear first.
What to do if you cannot find an item
Check if there is a similarly named item.
If you still are unable to locate the item, note it. Once you have all of the missing items, please submit a helpdesk ticket with the list of missing item names and note in the ticket it is for R365 Inventory Storage Locations.